A fixie built for under $50
This is the story of building a basic fixed gear bicycle while (almost) avoiding the purchase of any new, off-the-shelf components. While not as extreme as dumpster diving, the exercise got infused with some of that spirit.
Getting started: frames and parts
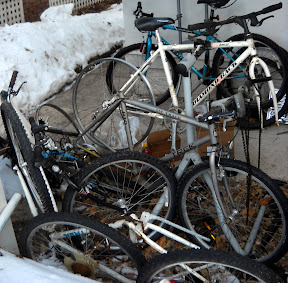
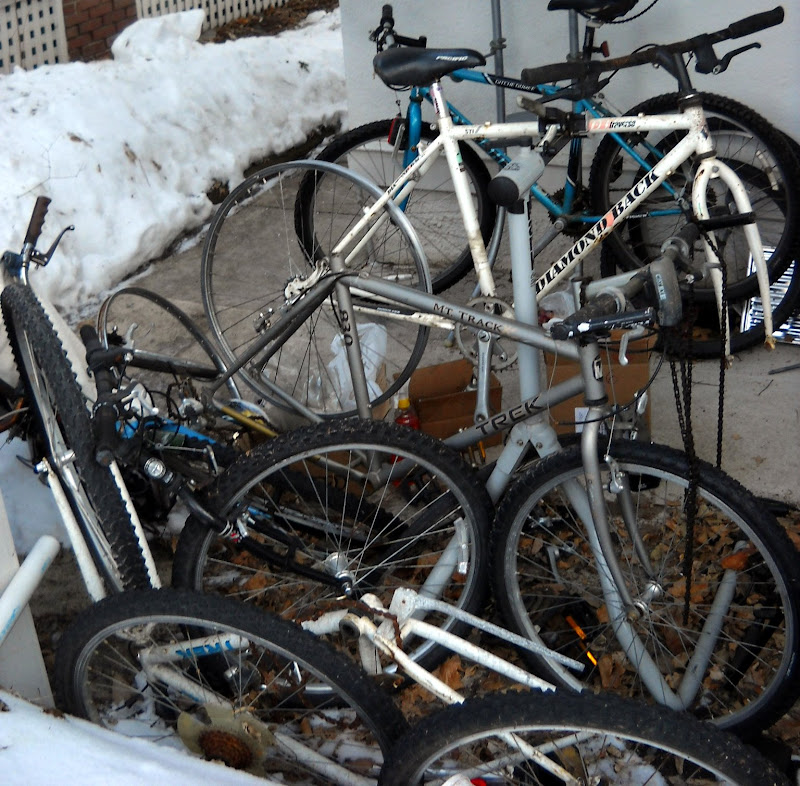
The main ingredients came from a jumble of 5 bike carcasses I had accumulated over the course of about 9 months. Here's what the backyard "shop" looked like mid-project. The white bike on the stand is the one that became the fixie.
|
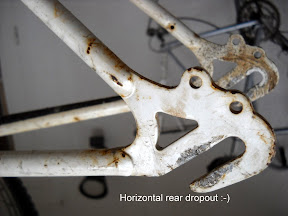
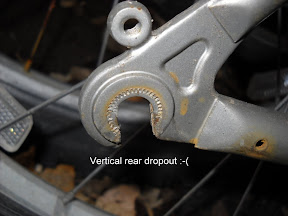
A suitable frame: horizontal rear dropouts
The most appropriate frames for fixed gear bikes have horizontal rear dropouts. These let you adjust the tension on the chain by sliding the rear axle back and forth. With short, vertical dropouts there's no way to slide the axle. Many older frames had horizontal dropouts but nowadays vertical dropouts are the norm.
|
|
Used frames with horizontal dropouts seem to be harder and harder to come by because (a) they've gone out of style, and (b) many of the old ones have already been converted to fixies. Although I originally planned to build a 27" or 700c road fixie the best frame in my pile with horizontal dropouts was a 26" mountain bike. So that's the one I picked. It has worked out well for utility riding around town, handy over railroad tracks or on muddy dirt paths and in the snow.
Fixing the rear hub
What defines a fixie is that the rear hub rotates in a fixed relationship to the crank. You can't stop pedalling, unless you stop the bike too. No coasting. No freewheeling. There are some notorious DIY ways to achieve this -- think of epoxying or welding a freewheel so it doesn't rotate. Possibly the least celebrated solution is to start with a rear hub designed for a conventional freewheel. You grind 3 notches in it, so that it matches a cog (aka "sprocket") that has 3 mating bumps or splines. Finally you keep the cog in place with an ordinary lock ring from an old-fashioned bottom bracket:

|
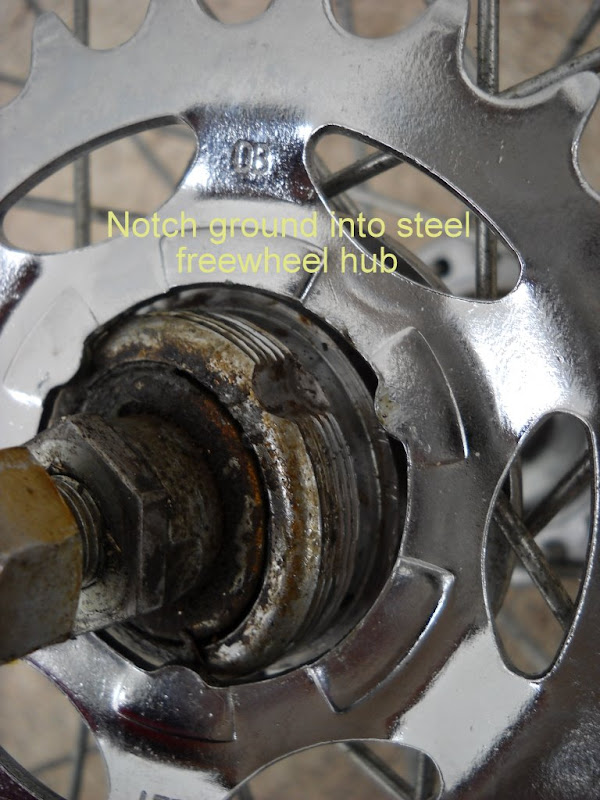
This kind of cog is specially designed for internal hub gear shifting systems made by Sturmey-Archer or Shimano (Nexus). If you can't find such a cog you'll have to buy one new, which is what I did. It turns out that cog was by far my most expensive purchase. As an aside, if you intend to use a (more common) narrow 3/32" chain you'll need to get a Shimano cog; the Sturmey-Archer cogs are wider and require a 1/8" chain.
Also, a steel hub from a cheap department store bike is a safer choice than a (more common and costly) aluminum hub because aluminum is so soft that the notches are likely to wear out. Fortunately I found an abandoned steel 27" rear wheel next to a public bike rack.
Important warning: Ingenious though this solution may be it suffers from an achilles heel. It doesn't last because the steel in the cog is harder than the steel in the hub, and so the latter eventually wears and the hub develops fore-and-aft play. I'm still working on a solution.
Building the rear wheel
I chose a rim and spokes from a wheel whose hub was a close size match to my steel notched hub, reasoning that the spokes would then be neither too short nor too long. Nevertheless the spokes seemed a little long, so I built the wheel with more spoke crossings (a 4-cross pattern) to take up the excess length. Still, a few spokes protruded ominously into the space where the tube would go, perhaps by 1/16", so I ground their ends down. (Also see the FAQ)
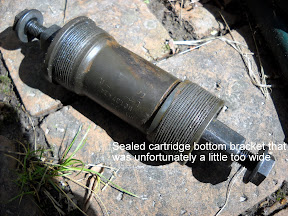
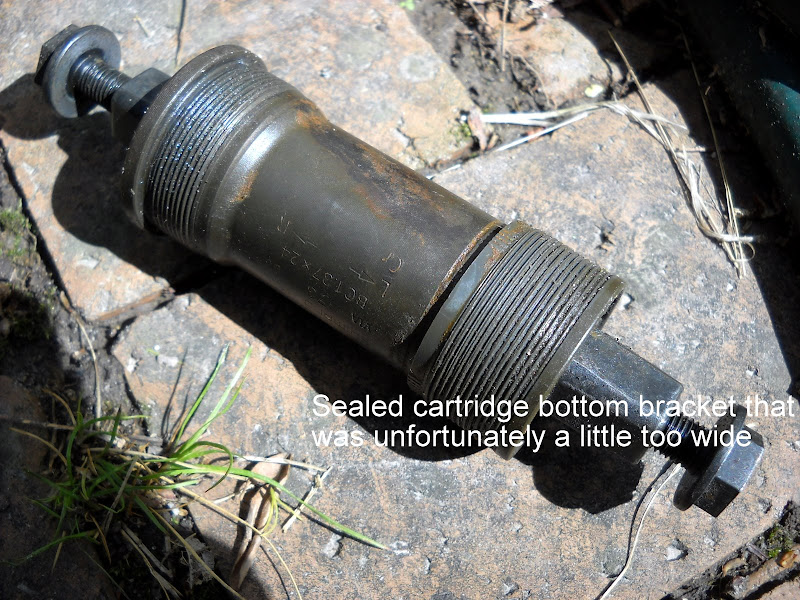
Bottom bracket
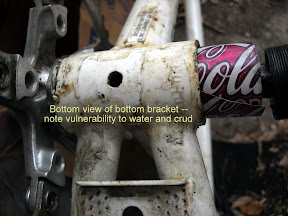
I'd hoped to replace the old-fashioned bottom bracket with a decent sealed cartridge bottom bracket from another carcass but the cartridge was a little too wide. So I had to overhaul the existing bottom bracket by transplanting bearings and retainers from other old bottom brackets. This worked fine. But then I remembered an old trick. If you cut up an old aluminum can and wrap it between the spindle and the shell it protects the mechanism from much of the water and mud that inevitably works its way into the frame. This simulates a bit of the protection provided by a modern sealed cartridge. So I disassembled the bottom bracket again and inserted a can of Cherry Cola.
|
|
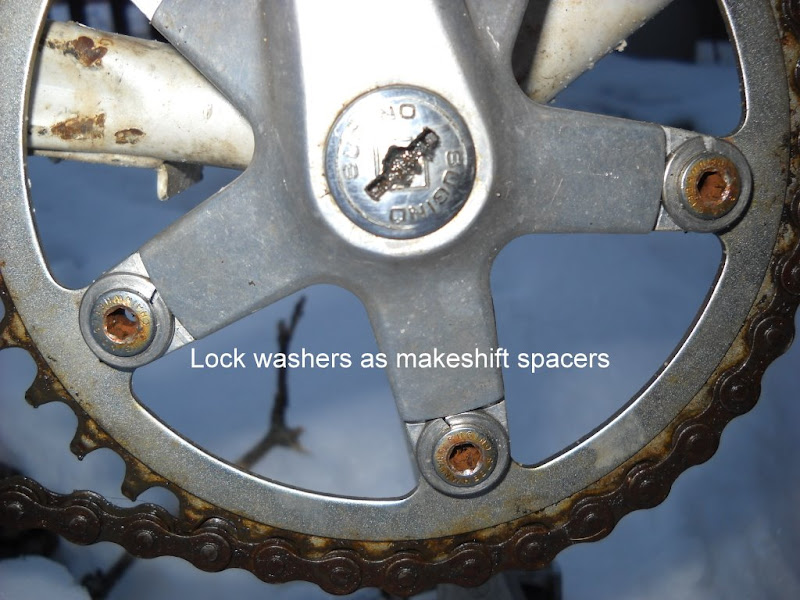
From double chainring (aka "chainwheel") to single
Low-end double (or triple) chainrings are often riveted together, making removal of the extra chainring problematic, leaving you with a deadbeat extra chainring. But one of my available double chainrings was bolted so I did not need to suffer this ignominy. However, when you remove a chainring the bolts will be too long to secure the remaining chainring to the crank spider. To avoid the expense of new, shorter chainring bolts or special chainring bolt spacers I found hardware store lockwashers that soaked up the extra space.
|
|
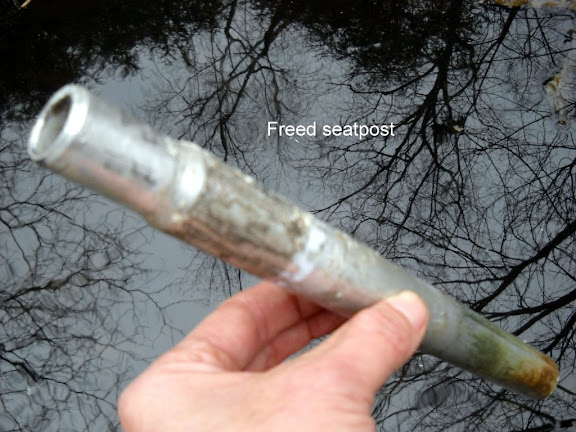
About stuck seat posts
One of the almost predictable problems with old bikes is that the seat post gets frozen into the seat tube. This is usually caused by rust from the steel seat tube and/or aluminum oxidation from the alloy seat post. There are endlessly many Internet discussions about this problem, like this thread.
Naturally, I had the problem. So every few days I dripped a little penetrating oil (PB Blaster) between the post and the tube. But the post stayed stuck. After several weeks I removed the seat and hammered -- hard -- on the top of the post. Eventually it budged downward a tiny fraction of an inch. Then I clamped a large old seat (large for leverage) to the post and twisted it out.
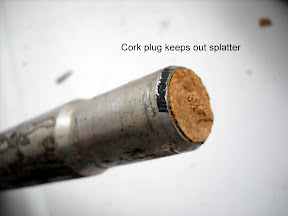
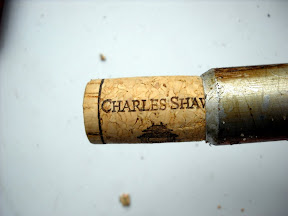
Since this is an old-style open-ended seat post I then decided to plug both ends so that gunk would not run down the seat tube to the bottom bracket. I used wine bottle corks, one from a bottle of Two Buck Chuck:

|
|
|
Had the hammer trick failed I had planned to plug the post, disassemble the cranks and bottom bracket (again), turn the frame upside down and pour ammonia into the seat tube, theorizing that the bonding was not from (steel) seat tube rust but from oxidation by the (aluminum) alloy seat post. Ammonia, they say, clears out that aluminum oxide. Fortunately this extra hassle wasn't necessary.
Gearing
It's unusually low -- 40T front, 22T rear -- the better to cope with neighborhood hills as well as winter snow.
Cost
Here's what it all cost.
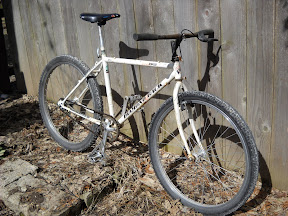
Finally, the result

|
|